As we increasingly rely on our iPhones to have reliable internet access everywhere, one of the most aggravating errors that can appear is “iPhone Can’t Connect To This Network.”
This frustrating popup emerges when your iPhone fails to connect to your preferred Wi-Fi network, leaving you offline.
iPhone Can’t Connect To This Network WiFi Error
In this comprehensive guide, we’ll walk through all the typical causes and fixes when you face the “Can’t Connect to This Network” Wi-Fi connectivity error on your iPhone.
Why the Vague “Can’t Connect to This Network” Error Pops Up?
Before jumping into troubleshooting steps to eliminate this wireless connectivity failure, let’s explore the common triggers behind the error message:
- Wi-Fi Router Issues – Problems with your Wi-Fi access point, like outdated firmware or hardware failures, can prevent iPhones from establishing a solid connection.
- Weak Wi-Fi Signal – If the router lacks range or obstacles impede signals in certain areas, low signal strength leads to the “Can’t Connect” error appearing.
- Incorrect Wi-Fi Password – An outdated or mistyped password when trying to have your iPhone join the network often results in this error.
- Software Bugs – Glitches in iOS on your iPhone or router firmware bugs can show the “Can’t Connect to This Network” message.
- Interference from Other Devices – Lots of electronics emitting wireless signals in the same space causes interference that blocks connectivity.
As you can see, issues either with your iPhone device itself or your Wi-Fi router/modem can trigger this error. The good news is once the specific cause is identified, the error can typically be rapidly fixed.
Top 7 Fixing Methods on iPhone Can’t Connect To This Network WiFi Error:
#1 Reconnect to the Wi-Fi Network
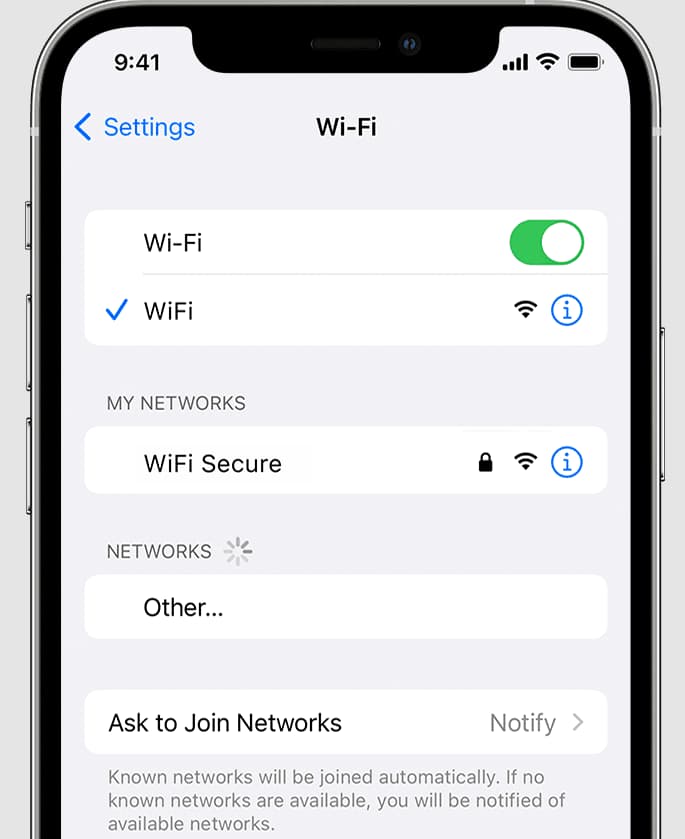
The first simple step whenever the “Can’t Connect to This Network” error pops up on your iPhone is to forget and then immediately reconnect to the same Wi-Fi. This refreshes the “handshake” where the iPhone links to your router.
Follow these quick steps:
- Go to Settings > Wi-Fi and tap the errant Wi-Fi name
- Select “Forget this Network” then confirm on the popup
- Reopen Wi-Fi settings immediately and reconnect to the same network
- Enter password if requested and try using apps/internet
Many users find this forces re-initialization of the Wi-Fi connection. After the iPhone essentially reconnects from scratch, the “Can’t Connect” error message goes away without further changes needed.
#2: Restart Your iPhone
If a standard reconnect doesn’t resolve the “Can’t Connect to This Network” Wi-Fi error, try restarting your iPhone. This essential reboot fixes software glitches that commonly cause wireless connectivity problems.
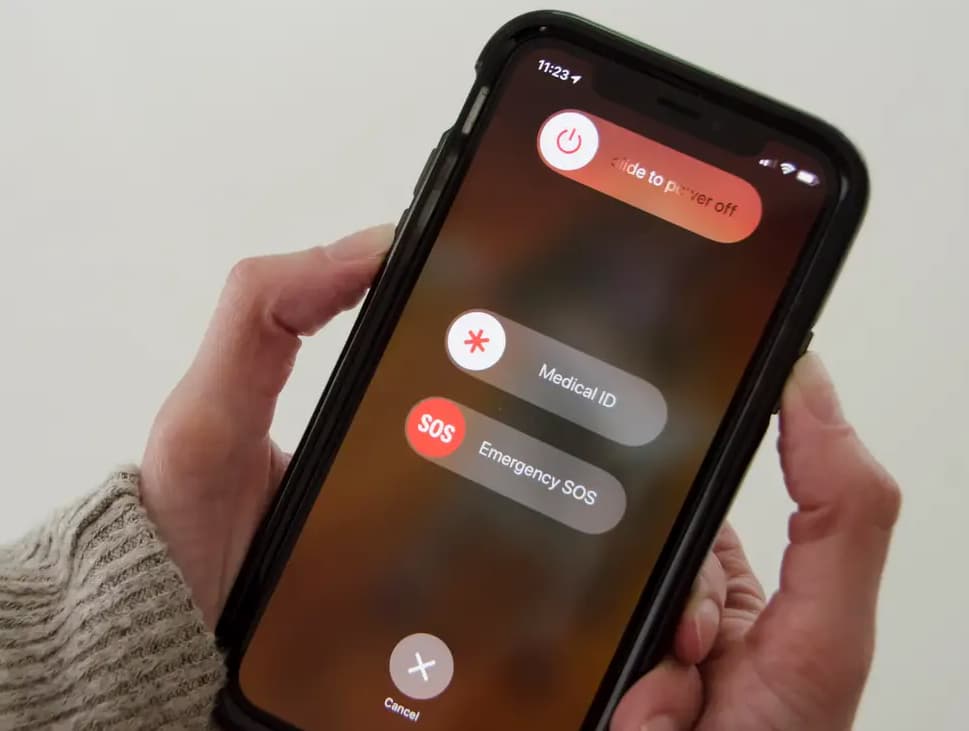
Here is the proper way to restart an iPhone:
- Open the Settings app and select “General”
- Scroll down and choose “Shut Down”
- Slide the red slider button to the right to power the iPhone completely off
- Don’t turn the device back on for at least 30 seconds
- Press and hold the side button to restart the iPhone
Allowing 30+ seconds with your iPhone powered down completes closes out background apps and processes. This gives the iPhone a fresh start, letting Wi-Fi make a strong reconnection after the restart completes.
#3: Toggle Airplane Mode On/Off
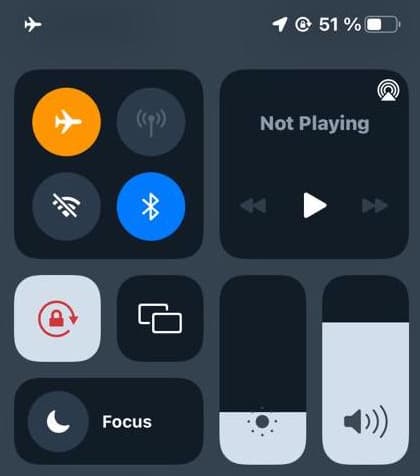
Here’s a super-quick trick to resolve the “Can’t Connect” error without full power cycling your iPhone:
- Open Control Center by swiping down from the top right of the screen.
- Press and hold the Airplane icon to enable Airplane Mode.
- Wait 30 seconds with connectivity disabled before switching Airplane Mode off.
- Head to Wi-Fi settings to reconnect to the network.
Toggling Airplane Mode essentially forgets all network connections, including Wi-Fi. When you turn Airplane Mode off, this forces the iPhone to completely re-establish the Wi-Fi connection. The fresh rejoin often stops the “Can’t Connect” error in its tracks for fast resolution.
#4: Power Cycle Your Modem, Router, or Both
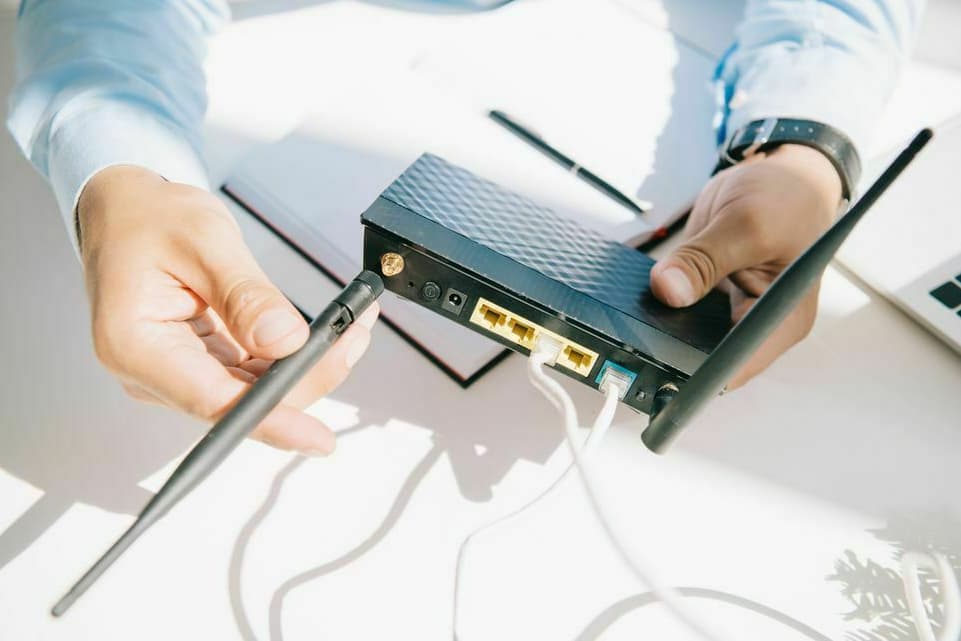
Issues with your internet modem and Wi-Fi router like outdated firmware can cause the “Can’t Connect” error on your iPhone. Rebooting/resetting the hardware often clears up common network-side connectivity problems.
Unplug both modem and router from electrical outlets, leave unpowered for 1 full minute, then reconnect power. Allow devices to fully reboot and try iPhone Wi-Fi again.
The networking gear restart assigns new IP addresses and flushes any software issues allowing smooth iPhone access again in just minutes with this router reboot.
#5: Update iOS Software and Apps
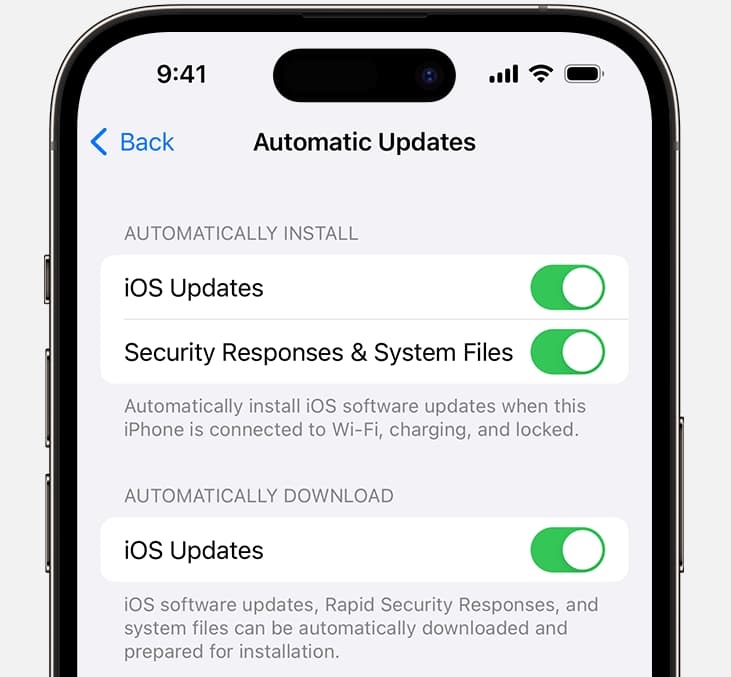
Sometimes bugs and glitches in iOS itself bring around connectivity errors like “Can’t Connect to This Network.” Maintaining current iOS software solves issues cropping up after system updates.
On your iPhone head to Settings > General > Software Update to download the latest iOS firmware. Also, open the App Store app and tap your user avatar > Check for Updates to install the newest versions of all apps.
Updating existing apps while keeping iOS itself up-to-date prevents software conflicts that can interrupt Wi-Fi connectivity.
#6: Delete/Rejoin the Wi-Fi Network
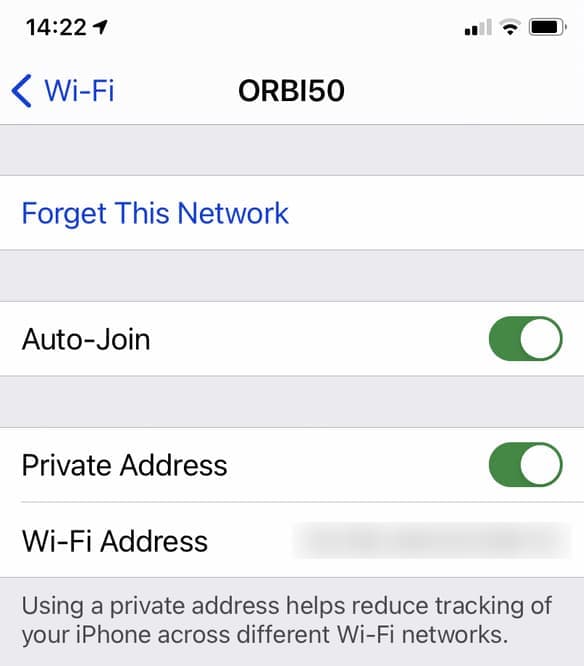
If your iPhone persists in displaying the “Can’t Connect” message, try deleting and then re-adding the Wi-Fi network entirely as follows:
- Write down the correct Wi-Fi name, password, and security.
- Go to Settings > Wi-Fi and select your network.
- Tap “Forget this Network” >> Confirm Forgetting.
- Leave Wi-Fi disabled for 1 minute.
- Return to Wi-Fi settings and choose your network name to rejoin.
- Enter the password if prompted so the iPhone reconnects from scratch.
This makes your device essentially set up Wi-Fi as if connecting for the first time. Any troublesome connection details get wiped allowing a fresh network join.
#7: Reset iPhone Network Settings
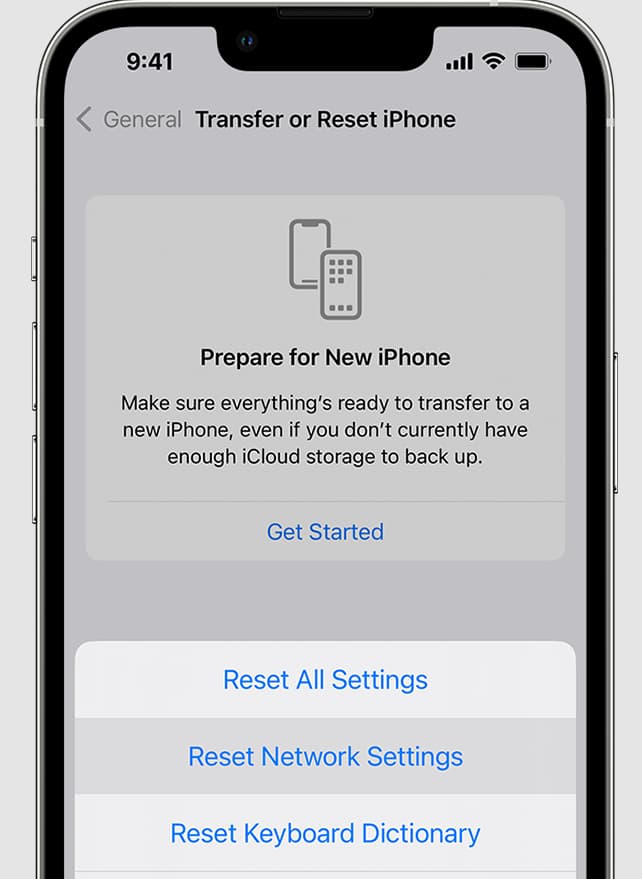
Still, encountering the same “Can’t Connect to This Network” error even after trying all other troubleshooting? Resetting all network settings often resolves persistent software and connection issues.
- Copy down all Wi-Fi names/passwords to re-enter after reset
- Go to Settings > General > Transfer or Reset > Reset
- Tap “Reset Network Settings” (this won’t erase iOS data)
- Confirm reset then reconnect to each Wi-Fi network
This fail-safe restores the iPhone to default network configurations without affecting the rest of iOS or your data/accounts. So don’t worry about losing anything else. Resetting network settings clears up lingering wireless bugs stopping stable connectivity.
Reduce Future “Can’t Connect to This Network” Errors
Once you’ve got Wi-Fi working reliably again on your iPhone, you want to avoid repeat “Can’t Connect” frustrations down the road. Here are key maintenance tips:
- Update iOS and apps to the newest versions whenever updates are available.
- Reboot your iPhone and router if connectivity seems sluggish.
- Occasionally toggle Airplane mode off/on to refresh Wi-Fi.
- Check the environment for electronics that could cause signal interference.
- Change your router’s Wi-Fi channel away from neighboring networks.
- Delete/rejoin the Wi-Fi network every few months to reset the connection.
Following preventative connectivity maintenance makes repeat “Can’t Connect” errors much less likely. But now you have a complete troubleshooting game plan if this error ever pops up again!
FAQs:
- Why does my iPhone connect properly to other Wi-Fi networks except my home one?
This points to a router configuration issue, outdated network security protocols, or software bugs directly related to your home Wi-Fi network hardware and settings rather than the iPhone itself.
- Do iPhone cases or covers sometimes interfere with Wi-Fi signals?
Yes, certain iPhone case materials especially on thick/protective covers can potentially dampen Wi-Fi connections. Try temporarily removing the case and see if connectivity improves.
- If my wireless router is several years old, can aging hardware increase connectivity issues?
Absolutely – older Wi-Fi routers often have slower processors, faulty antennas, and compatibility issues with newer devices. Upgrading to a current-generation router typically improves connectivity speeds and reliability.
- How far away can the iPhone reliably maintain a strong Wi-Fi connection?
Under perfect conditions, the Wi-Fi range can reach 300+ feet from the router but typically reliable connectivity spans 150 feet or less – walls and structures further reduce the effective range between devices and router.
- Should I set up my router in the center of my home for the best Wi-Fi coverage?
Centrally locating your Wi-Fi router does often provide the widest, most balanced signal distribution instead of positioning it in a far corner or periphery of living space if possible.
- Can microwave oven use interfere with Wi-Fi signals to iPhones?
Yes! Microwaves operate on the same general wireless frequency bands as Wi-Fi so running a microwave can disrupt Wi-Fi connections. Avoid microwave use whenever downloading files or video streaming over Wi-Fi.
- If none of these fixes resolve Wi-Fi connection problems should I contact my ISP?
Yes, if you still see “Can’t Connect” errors after trying every troubleshooting step, there may be an issue on your ISP’s network side – call technical support to investigate further.
- How can I find the best Wi-Fi channel to select for my wireless router?
To reduce interference from neighboring Wi-Fi networks, use a Wi-Fi analyzer app to view all network channels in use then choose an unused or lesser-populated channel for your router’s network.
- Should I set a fixed IP address on my iPhone instead of using DHCP?
Typically no – DHCP dynamically assigning IP addresses leads to fewer potential conflicts. Only select manual IP address configurations on Wi-Fi if you absolutely must assign a fixed, static IP to your device.
- Besides resetting my iPhone network settings what else gets deleted if I restore the iPhone system?
Full factory reset erases all contents and settings including everything stored locally on the device. Back up vital data like photos before attempting a full system restore to fix connectivity issues.
Top 10 Tips to prevent future “Can’t Connect to This Network” errors on iPhone:
- Tip 1: If your iPhone connects properly to other Wi-Fi networks except your home one, this points to a router configuration issue, outdated network security protocols, or software bugs directly related to your home network hardware.
- Tip 2: Some iPhone cases, especially thick protective covers, can potentially dampen Wi-Fi signals. Try temporarily removing the case and see if connectivity improves.
- Tip 3: Older Wi-Fi routers often have compatibility issues with newer devices. Upgrading to a current-generation router typically improves connectivity speeds and reliability.
- Tip 4: While the Wi-Fi range can reach 300+ feet under perfect conditions, reliable connectivity typically spans only 150 feet or less. More obstructions further reduce this effective range between devices and routers.
- Tip 5: Centrally locating your Wi-Fi router provides the widest, most balanced Wi-Fi coverage across your living space, instead of positioning the router in a far corner or periphery.
- Tip 6: Microwave ovens operate on the same general wireless bands as Wi-Fi, so running your microwave can disrupt connections. Avoid microwave use whenever downloading files or video streaming over Wi-Fi.
- Tip 7: If you still see “Can’t Connect” errors after exhausting troubleshooting, contact your ISP – there may be an issue on their network side.
- Tip 8: To reduce interference from neighboring Wi-Fi networks, use a Wi-Fi analyzer app to select a lesser-used channel for your router instead of default settings.
- Tip 9: Typically keep DHCP enabled to dynamically assign IP addresses. Only use manual IP address configurations on Wi-Fi if you must assign a fixed, static IP to your device.
- Tip 10: Full factory reset erases all contents and settings including everything stored locally on a device. So backup vital data like photos before a full system restore to fix connectivity issues.
Editor’s Recommendations:
- How to Change Notes Password on iPhone
- How to Change Snooze Time on iPhone
- Why is iPhone Battery Yellow & How to Fix It
- How to Remove Credit Card from DoorDash App on iPhone
- Create iCloud Account To Access Apple Services on iPhone/Mac/iPad
- Unresponsive iPhone Touch Screen
Conclusion:
Getting frustrated with vague connectivity issues like the “Can’t Connect to This Network” error is completely understandable.
Hopefully, this comprehensive troubleshooting guide has equipped you to get to the bottom of why the iPhone won’t join your Wi-Fi network and resolve problems rapidly.
Now that you know the most likely triggers causing the error and have simple yet effective fixes, you can keep enjoying steadfast wireless connectivity. Bookmark this page so the reliable troubleshooting checklist is handy if the pesky “Can’t Connect” message ever shows up again.
And please share this post far and wide with other iPhone users in your life so they too can stress less when connectivity issues strike!
With the wisdom in this article, every iPhone owner can master banishing Wi-Fi woes for good.