Want to build your own high-powered gaming rig or workstation tailored to your needs? Our comprehensive guide walks you through selecting compatible components, essential pre-build preparation, step-by-step assembly instructions, first boot tips, and post-build configuration. You’ll learn how to choose the right parts for your budget, Useful lessons for first-time builders on installing delicate components like the CPU and cooler properly, routing tricky cables, and getting everything running smoothly with a successful first boot. Follow along to create a personalized, super-fast PC to game, create, and work on. We’ll turn that intimidating pile of parts into a badass custom computing machine.
Building your custom PC is the ultimate dream for any tech enthusiast. There’s nothing quite like the satisfaction of booting up a computer you pieced together yourself for the very first time.
But the process can seem daunting, especially for first-time builders. All those unfamiliar components and complicated names like motherboard, GPU, and SSD can be intimidating.
Where do you even begin to pick parts and how do you make sure they’re all compatible? How do you put everything together securely without breaking something expensive? And what happens if it doesn’t boot up on the first try?
The truth is, that assembling a custom PC is very approachable if you take the time to learn about the parts and follow a proper step-by-step build process.
The result is a high-powered machine tailored specifically to your needs and budget. No bloated software or components you’ll never use getting in the way. Just raw, custom-tuned performance.
How to Build a Custom PC?

In this guide, we’ll walk you through everything you need to know to build your custom PC, from parts selection to firing it up for the first time.
You’ll learn how to choose components that work together flawlessly, helpful pre-build tips, and a detailed build process from start to finish.
Let’s get started planning your custom computing beast!
Step 1: Picking the Perfect Parts for Your Custom PC
Selecting compatible components is the most crucial step in planning your custom PC build. With so many options for each part, it can get overwhelming trying to put together a complete build list. But if you understand the basics of what to look for in each main component, you can assemble a high-performing and reliable parts list.
Here are the core components you’ll need to select, along with key factors to consider for each:
CPU (Processor)
The CPU, or processor, is essentially the “brain” of your computer. It carries out most of the actual computations and calculations for everything you do on your PC.
- Key factors:
- Cores – More cores allow for better multitasking and performance in multi-threaded apps. Modern options range from 4 up to 64 cores.
- Clock speed – Given in gigahertz (GHz), this determines how fast the CPU can process instructions. Higher is better, but not always necessary.
- Socket – The CPU socket must match the socket on your motherboard. Common sockets today are LGA 1200 and AM4.
For most custom builds, the latest generation Intel Core i5 or i7 CPU is a perfect match for price and performance. AMD Ryzen CPUs are also excellent options.
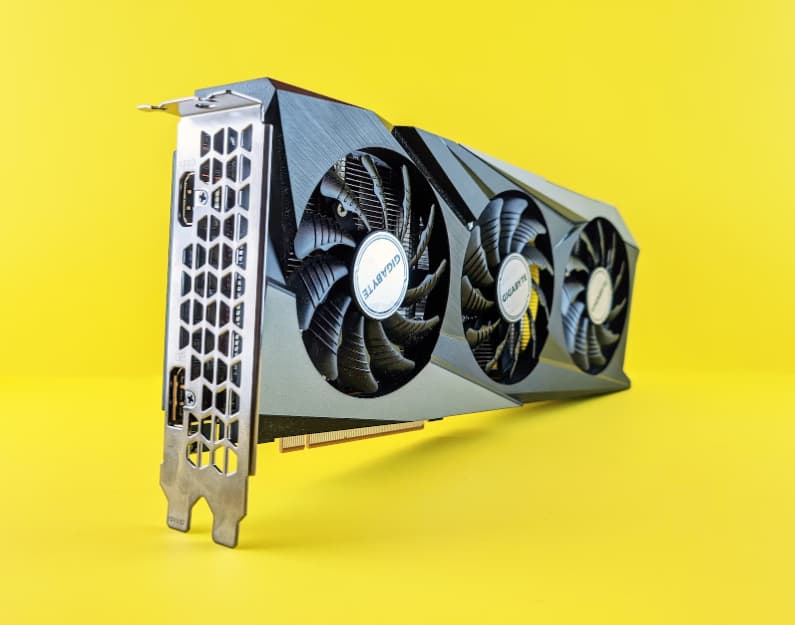
GPU (Graphics Card)
The graphics card, or GPU, handles all the complex graphical tasks like rendering games or video. It’s one of the most important parts of gaming and media builds.
- Key factors:
- VRAM – More video RAM allows the GPU to process higher-resolution textures and models. 4-8GB is common for mid-range cards today.
- CUDA/Stream processors – More processing cores lead to improved performance. Aim for at least 1000+ cores.
- Outputs – Ensure your GPU supports your monitor setup with HDMI, DisplayPort, etc.
Popular GPU picks these days are the NVIDIA GeForce RTX 3060 Ti or AMD Radeon RX 6600 XT. Match the GPU power to your target resolution and frame rate.
RAM (Memory)
RAM provides short-term storage for active apps and files for fast access by the CPU/GPU. Faster and higher quantity RAM delivers better general performance.
- Key factors:
- Capacity – Aim for at least 16GB RAM for modern builds, with 32GB recommended for hardcore gaming or creative workstations.
- Speed – Given in megahertz (MHz), with common DDR4 speeds being 2400 to 4000MHz. Higher is better.
- DDR Version – Ensure compatibility as older motherboards may only support up to DDR3. Newer builds should use DDR4.
Two 8GB DDR4 RAM sticks running at 3000+ MHz deliver the best price/performance for most builds.
Motherboard
The motherboard connects all the components so they can communicate. Matching the socket and chipset to your other parts is critical.
- Key factors:
- Socket & Chipset – Ensure the socket fits your CPU, and the chipset matches your CPU brand (Intel or AMD).
- RAM support – Confirm the board supports your desired RAM type, speed, and capacity.
- PCIe slots – Ideally have at least one PCIe 3.0 or 4.0 x16 slot for your graphics card.
- Connectivity – Requirements like WiFi, Bluetooth, USB ports, and sufficient SATA ports.
B550 or X570 boards for AMD and B560 or Z590 for Intel-based builds are excellent options with full modern connectivity.
Storage
Storage handles saving all your programs, games, files, and the operating system for long-term access. You’ll want both fast and high-capacity options.
- Key factors:
- SSD – A boot solid state drive stores the OS and apps for quick access. 500GB minimum, but 1-2TB is better.
- HDD – Optional hard disk drive for mass storage of files, photos, videos, etc. Look for at least 1TB.
- M.2 – M.2 2280 SSDs are faster than 2.5″ SATA SSDs. Use for your OS drive if supported.
A 500GB M.2 NVMe SSD paired with a 2TB HDD makes for quick boots and ample storage.
Power Supply
The PSU provides stable, clean power to all your components. A higher efficiency rating saves electricity and heat.
- Key factors:
- Wattage – 650-850W is ideal for most single GPU systems. Allow ample headroom over the estimated wattage.
- Efficiency rating – Look for 80+ Bronze or ideally 80+ Gold-rated units from reputable brands.
- Modularity – Semi or fully modular PSUs allow the removal of unneeded cables for cleaner builds.
Quality 750W 80+ Gold PSUs from Corsair, EVGA, and SeaSonic offer excellent performance and efficiency.
Case
The case houses all your components and protects them. Look for good airflow and build quality.
- Key factors:
- Motherboard size – Ensure the case supports your motherboard form factor like ATX or micro-ATX.
- GPU clearance – Confirm your graphics card will physically fit in the case.
- Cooling – Look for at least 2-3 included fans and support for liquid cooling radiators if desired.
- Cable management – Better cases have cutouts for cleaner cable routing.
The Fractal Design Meshify, Lian Li Lancool II, and Corsair 4000D all offer excellent cooling and cable management.
Carefully selecting each component to match your budget and performance goals is the most important step in your custom PC build.
Take the time to research each part category and choose quality components that are designed to work together seamlessly.
This will give you the best chance of success on your first PC build.
Pre-Build Tips to Set Yourself Up for PC Building Success

You have your parts selected and they’ve started arriving at your doorstep. The excitement is building! But before you dive into snapping together your custom computing creation, taking some time to prepare will make the process infinitely smoother.
Here are important pre-build steps to take that will set you up for success:
Ensure You Have All the Right Tools
While elaborate PC-building toolkits exist, you can get away with just a few basics:
- Phillips head screwdriver – For installing the motherboard, storage drives, PSU, etc. A magnetic tip helps enormously.
- Zip ties – For tidying up cable runs and securing them in place. Get a pack of various sizes.
- Wire cutters – Make sure you have a way to cleanly cut zip ties once pulled tight.
- Thermal paste – Crucial for proper heat transfer between the CPU and cooler. The Noctua NT-H1 is excellent.
- Anti-static wrist strap – Not 100% mandatory, but prevents static discharge from damaging components.
Having these tools on hand will make the installation process as smooth as can be.
Review All Component Manuals
Every part of your new computer will come with manuals covering installation, configuration, and general use. While you may be eager to dive into the building, taking the time to read through each component’s manual will prove invaluable:
- Motherboard – Pay extra close attention to the motherboard manual. It will cover details like properly installing the CPU, RAM, M.2 drives, front panel connectors, and more.
- CPU & Cooler – Look for instructions on applying thermal paste and mounting the cooler to the motherboard.
- Power Supply – The PSU manual will show how to securely connect the 24-pin ATX and CPU EPS power connectors to the motherboard, as well as power to components like GPUs and storage drives.
- Storage – Look for details on properly mounting M.2 SSDs and 3.5″ hard drives in your case.
- Case – The case manual will explain front panel connectivity and drive installation.
Having the manuals on hand during the build makes looking up component specifics easy.
Watch PC Build Tutorials
In addition to reviewing manuals, watching detailed PC build videos can provide invaluable visual guidance during your process:
- YouTube – Channels like Linus Tech Tips, JayzTwoCents, Paul’s Hardware, and BitWit have excellent step-by-step build videos.
- Manufacturer videos – Many component makers like MSI, Corsair, and AMD also have tutorials for working with their products.
Seeing someone experienced walk through the build will demystify the process and prepare you to tackle it yourself.
Plan Your Build Order
With your specific parts in mind, plan out in what order you’ll need to install components before putting the system together:
- Install the CPU, cooler, and RAM on the motherboard first.
- Connect necessary power cables to the power supply.
- Mount the storage drives, power supply, and any case fans in the case.
- Lower the motherboard and connect the front panel wires.
- Install the graphics card, connect the remaining power cables, and manage all cables cleanly.
Having an installation game plan will prevent missteps and backtracking during the process.
The few steps above will put you in a prime position for a smooth, successful custom PC building experience your first time out. Don’t rush into the build – taking the time to learn, prepare, and plan is just as crucial as snapping all those components together.
A Step-by-Step Guide to Assembling Your Custom PC
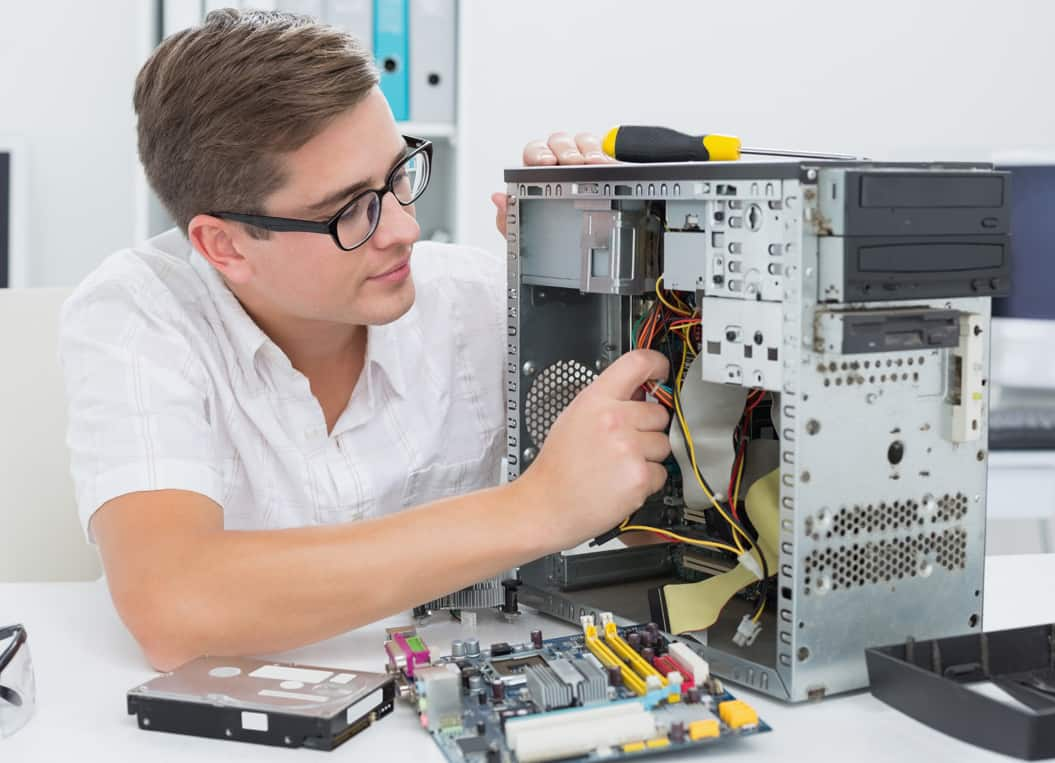
The prep work is done and your components are laid out in order – it’s time to put together your custom gaming PC or workstation physically! This is the fun but potentially nerve-wracking phase of turning a pile of computer parts into a fully functional system.
Take a deep breath, follow along carefully, and avoid rushing. Here is a detailed step-by-step walkthrough of the entire PC build process from start to finish:
Install the CPU in the Motherboard
This is one of the more delicate steps, so take care not to bend any pins!
- Open the CPU socket retention arm and align the CPU triangle markers.
- Seat the CPU firmly but gently in the socket. Zero force is required!
- Close the socket retention arm to secure the CPU in place.
Refer to your motherboard manual for full specifics on your particular board.
Install the CPU Cooler
- Apply a pea-sized dot of thermal paste onto the CPU.
- Align and seat the cooler onto the CPU mounting brackets.
- Alternate tightening opposite corners until securely fastened.
- Connect the CPU cooler fan header to the motherboard.
Do not overtighten the cooler, but make sure it’s firmly seated with thermal paste applied.
Insert RAM Modules
- Locate the RAM slots on the motherboard, often labeled DIMM A1/A2 or similar.
- Press the clips outward and align the notch in the RAM stick with the slot.
- Firmly press the RAM straight down until both clips click into place.
Check your motherboard manual for how many sticks to install in which order.
Mount M.2 SSDs
- Locate the M.2 slot, usually under a heatsink shield on the board.
- Insert the SSD at a 30-degree angle.
- Secure with the provided mounting screw.
Take care not to force the M.2 drive – it should click smoothly into place.
Install Power Supply in Case
- Place the power supply in the case mounting bracket.
- Secure it using the screws that came with the case.
Ensure the power supply fan faces downwards for proper airflow.
Install Storage Drives in Case
- For 3.5″ HDDs, attach to the drive caddies using the included screws.
- Slide the drive caddies into the mounting brackets until they click into place.
- For 2.5″ SSDs, attach directly to the case drive bays.
Refer to your case manual for specifics on drive installation.
Install Case Fans
- Most cases come with 1-3 pre-installed fans. Install any additional fans you’ve purchased.
- Consult the case manual for proper fan placement.
- Connect fan headers to the motherboard.
More fans mean better cooling, but 2-3 is plenty for most builds.
Install the Motherboard
- Lower the motherboard into the case horizontally until it lines up with the rear port cutout.
- Align the motherboard standoffs with the mounting holes.
- Secure the motherboard with the provided case screws.
Take care not to bend or force the motherboard at an angle during installation.
Connect Front Panel Headers
- Locate the front panel switch/LED connectors coming from the case.
- Refer to the motherboard manual for specific front header pinouts.
- Press the connectors onto the correct header pins.
Proper polarity is crucial, so double-check the pinout!
Install the Power Supply Cables
- Connect the 24-pin ATX and 8-pin EPS power cables to the motherboard.
- Connect the SATA power cables to any storage drives.
- Plug in the 6+2 pin PCIe cables to your graphics card.
Fully modular power supplies allow you to use only the exact cables needed.
Insert Graphics Card
- Press down on the PCIe slot retention tab.
- Align the card with the topmost full-length slot.
- Push the card straight down until it clicks into place.
Avoid angling the card, which can damage the PCIe slot.
Manage Your Cables
- Route and hide cables out of the airflow path as best as possible.
- Group similar cables together.
- Use zip ties and clips to contain and organize cables.
- Replace any unused modular PSU cables.
Neat cabling improves airflow and aesthetics.
With all components installed and wired up, your physical PC build is complete! Now comes the fun part – firing it up for the very first time.
What to Do AFTER Building Your PC?
The moment of truth has arrived. After hours of carefully piecing together your optimized collection of components, it’s time to press the power button and boot things up!
Don’t get too ahead of yourself just yet though. Before firing it up, double-check all connections and take a few preparatory BIOS steps.
Here’s a roadmap of what to expect during the first boot and how to get your fresh custom build configured and ready to use:
Triple All Connections
Before ever turning on the power, do a thorough inspection of all connections:
- Power cables – Ensure the 24-pin ATX and 8-pin CPU power cables are fully seated into the motherboard and PSU.
- SATA data & power – Check that SATA cables and power are properly connected to all storage drives.
- Front panel – Confirm the tiny front panel power LED, power button, reset, etc wires are on the correct header pins.
- Fans – Verify all fans and the CPU cooler are plugged into fan headers on the motherboard.
- GPU – Make sure the graphics card PCIe power cables and slot connection are secure.
Finding a loose connector before powering on helps avoid frying components!
Flip the PSU Switch On
If your power supply has a rear power toggle, ensure it is switched on before pressing the case power button. Many modern PSUs lack a physical switch though.
Press the Magic Power Button
- Take a deep breath and press the power button on the case’s front panel.
- The CPU and case fan should spin and lights will indicate the system is booting.
- If nothing happens, don’t panic! Recheck the steps above or troubleshoot here.
Hooray! If fans are spinning and lights are on, you’ve got a successful first boot.
Enter the BIOS
- Press the one-time BIOS key during the initial boot, usually Delete or F2, to enter the BIOS.
- Navigate to the memory section and enable the XMP profile for your RAM’s rated speeds.
- Adjust the boot order if needed to select your OS drive.
- Save changes and exit the BIOS.
Enabling XMP is crucial to get your expensive, high-speed RAM running at rated specs!
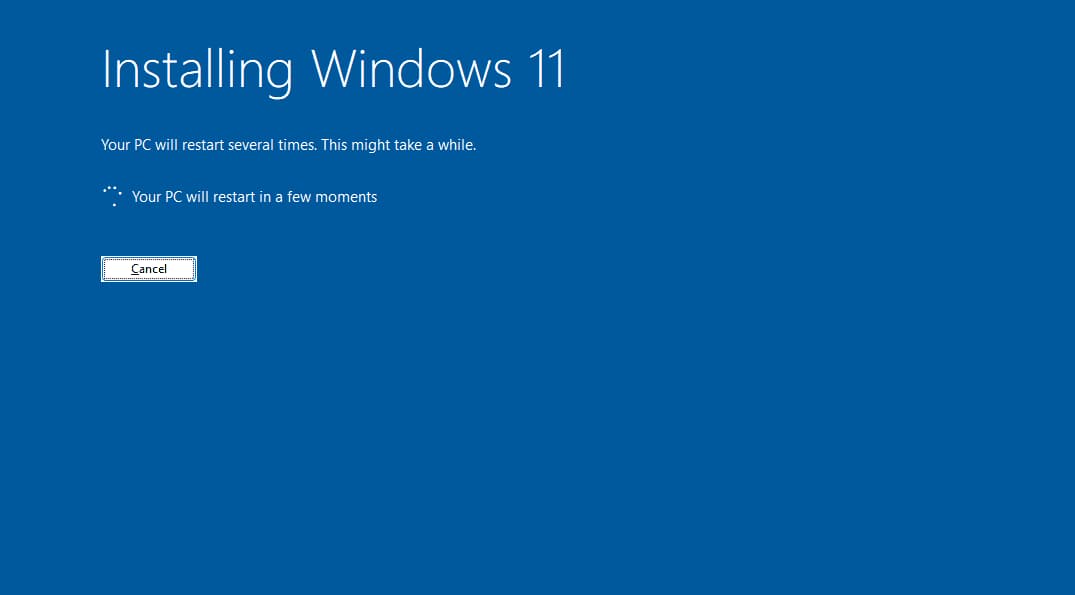
Install Windows
- Insert the USB flash drive with your Windows or Linux distro ISO burned on it.
- Reboot the PC and select the flash drive to boot from.
- Kick back while Windows installation completes.
You can now install Steam, Chrome, and anything else you want!
Install Motherboard Drivers
- Go to your motherboard support page and download the chipset, LAN, audio, and other drivers.
- Install these to enable all functionality and optimizations.
Keep drivers updated via your motherboard software utility.
Enable Windows Updates
- Windows Update provides critical OS and security patches.
- Enable automatic background updates for convenience.
- Reboot when prompted to finish installing updates.
Never skip updates – they fix bugs and vulnerabilities!
Install Remaining Software
- Browsers, games, creativity suites, monitoring utilities – set up everything you need.
- Run benchmarks to validate that your hardware is performing as expected.
- Play some games and revel in your newfound framerates!
Customize your software setup to match your use case. Game on!
With the first boot behind you and all the finishing touches applied, you can now enjoy a fully personalized powerhouse PC you put together yourself. Congratulations – you did it!
Pro Tip: Install or Update Multiple Apps at Once by Ninite
Wrapping Up Your Custom PC Build on a High Note
After the hours spent poring over parts lists, delicately assembling components, routing cables, and configuring software, take a moment to revel in your accomplishment. You set out to build a custom PC, and now have a powerful, hand-crafted machine perfectly tailored to your needs.
Here are some closing thoughts on your experience:
Recap the Process
- Carefully researched compatible components for your budget and use case.
- Took time to learn the proper installation steps for each part.
- Followed a logical build order for smooth assembly.
- Successfully configured the BIOS and installed Windows.
- Added all your favorite games and software.
Looking back at the big picture helps you appreciate the full experience.
Lessons Learned
As a first-time builder, you likely picked up some useful knowledge for future builds:
- Importance of component compatibility and planning build order.
- Necessity of thermal paste application and cooler mounting pressure.
- Tricky intricacies of front panel wiring.
- How to enable XMP to achieve full RAM speeds.
- Techniques for tidy cable management.
Remember lessons like these for additional PC projects down the road.
Ideas for Future Improvements
While awesome as is, you can already envision some upgrades:
- Adding more RAM when funds allow.
- Extra storage drives for more games and media.
- Additional case fans for increased airflow.
- A beefier GPU a few generations down the line.
- Swapping out the case for something with a window.
Half the fun is fantasizing about future component changes!
You Might Like It:
- 200+ Computer and Internet Related Full Forms & Abbreviations
- How Do I Transfer Files from iPhone to Windows 10 PC
- How to Fix Blue Screen Error on Windows 10
- What is Bootrec Fixboot Access is Denied in Windows 10
- Irql_not_Less_or_Equal Windows 10
- Page_Fault_in_nonpaged_area Windows 10
Closing Thoughts
Take pride in the fact that you designed and assembled an entire computer completely from scratch. Whenever you’re blowing up enemies in your favorite games or working on important projects, remember that it’s all thanks to your technical skills and persistence to build it yourself.
Congratulations on an incredibly satisfying, educational journey into custom PC building – may it be the first of many!